> ## Documentation Index
> Fetch the complete documentation index at: https://unstructured-53-docs-243-plugins.mintlify.site/llms.txt
> Use this file to discover all available pages before exploring further.
# Overview
If you're new to Unstructured, read this note first.
Before you can create a source connector, you must first [sign up for Unstructured](https://platform.unstructured.io).
After you sign up, the [Unstructured user interface](/ui/overview) (UI) appears, which you use to create the source connector.
After you create the source connector, add it along with a
[destination connector](/ui/destinations/overview) to a [workflow](/ui/workflows). Then run the worklow as a
[job](/ui/jobs). To learn how, try out the [hands-on UI quickstart](/ui/quickstart) or watch the 4-minute
[video tutorial](https://www.youtube.com/watch?v=Wn2FfHT6H-o).
You can also create source connectors with the Unstructured API.
[Learn how](/api-reference/workflow/sources/overview).
If you need help, reach out to the [community](https://short.unstructured.io/pzw05l7) on Slack, or
[contact us](https://unstructured.io/contact) directly.
You are now ready to start creating a source connector! Keep reading to learn how.
Source connectors are essential components in data integration systems that establish a link between your files and the data ingestion process. They facilitate the batch processing of files, allowing for the systematic retrieval and ingestion of data stored in various file formats.
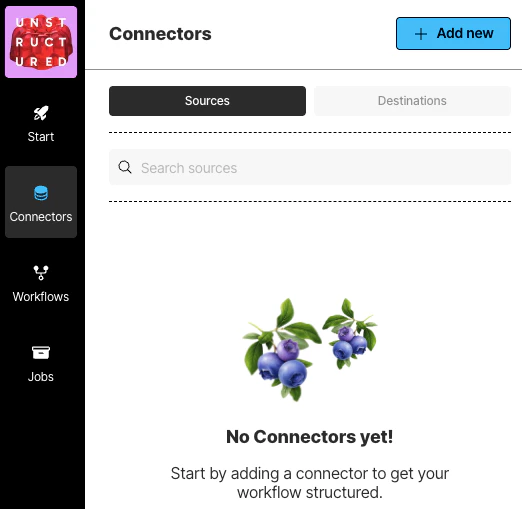 To see your existing source connectors, on the sidebar, click **Connectors**, and then click **Sources**.
To create a source connector:
1. In the sidebar, click **Connectors**.
2. Click **Sources**.
3. Cick **New** or **Create Connector**.
4. For **Name**, enter some unique name for this connector.
5. In the **Provider** area, click the source location type that matches yours.
6. Click **Continue**.
7. Fill in the fields according to your connector type. To learn how, click your connector type in the following list:
* [Azure](/ui/sources/azure-blob-storage)
* [Box](/ui/sources/box)
* [Confluence](/ui/sources/confluence)
* [Couchbase](/ui/sources/couchbase)
* [Databricks Volumes](/ui/sources/databricks-volumes)
* [Dropbox](/ui/sources/dropbox)
* [Elasticsearch](/ui/sources/elasticsearch)
* [Google Cloud Storage](/ui/sources/google-cloud)
* [Google Drive](/ui/sources/google-drive)
* [Jira](/ui/sources/jira)
* [Kafka](/ui/sources/kafka)
* [MongoDB](/ui/sources/mongodb)
* [OneDrive](/ui/sources/onedrive)
* [Outlook](/ui/sources/outlook)
* [PostgreSQL](/ui/sources/postgresql)
* [S3](/ui/sources/s3)
* [Salesforce](/ui/sources/salesforce)
* [SharePoint](/ui/sources/sharepoint)
* [Snowflake](/ui/sources/snowflake)
* [Zendesk](/ui/sources/zendesk)
8. If a **Continue** button appears, click it, and fill in any additional settings fields.
9. Click **Save and Test**.
To see your existing source connectors, on the sidebar, click **Connectors**, and then click **Sources**.
To create a source connector:
1. In the sidebar, click **Connectors**.
2. Click **Sources**.
3. Cick **New** or **Create Connector**.
4. For **Name**, enter some unique name for this connector.
5. In the **Provider** area, click the source location type that matches yours.
6. Click **Continue**.
7. Fill in the fields according to your connector type. To learn how, click your connector type in the following list:
* [Azure](/ui/sources/azure-blob-storage)
* [Box](/ui/sources/box)
* [Confluence](/ui/sources/confluence)
* [Couchbase](/ui/sources/couchbase)
* [Databricks Volumes](/ui/sources/databricks-volumes)
* [Dropbox](/ui/sources/dropbox)
* [Elasticsearch](/ui/sources/elasticsearch)
* [Google Cloud Storage](/ui/sources/google-cloud)
* [Google Drive](/ui/sources/google-drive)
* [Jira](/ui/sources/jira)
* [Kafka](/ui/sources/kafka)
* [MongoDB](/ui/sources/mongodb)
* [OneDrive](/ui/sources/onedrive)
* [Outlook](/ui/sources/outlook)
* [PostgreSQL](/ui/sources/postgresql)
* [S3](/ui/sources/s3)
* [Salesforce](/ui/sources/salesforce)
* [SharePoint](/ui/sources/sharepoint)
* [Snowflake](/ui/sources/snowflake)
* [Zendesk](/ui/sources/zendesk)
8. If a **Continue** button appears, click it, and fill in any additional settings fields.
9. Click **Save and Test**.